My painful but worthwhile migration from WordPress to Jekyll
A journey from a bloated dynamic blog to a svelte static blog

Update: I created a script to make this process much easier!
When I was thinking about the best way to share my findings to a wide audience when I reverse engineer malware Jekyll was an obvious choice, because I already write my notes in Markdown. However, I already have a successful WordPress blog that I had hosted in GCP since 2016. I didn’t want to maintain two blogs, so I set out to migrate my existing 30 posts and 117 media files to Jekyll.
There are lots of advantages to Jekyll over WordPress, especially for small blogs:
- Free hosting on GitHub Pages
- Compared about $26/month for a
g1-smallGCP VM in theus-east-c1zone
- Compared about $26/month for a
- No more server to maintain
- No more managing a ton of plugins (often commercial) just to do basic things like SEO
- A modern open source theme (with a dark mode!) designed for my use case
- The entire site is under version control — not just the posts
At first glance, the only downside I knew of was that Markdown does not support nest tables like the one I use in my DMARC guide, but I knew that I could just use an HTML table instead table in the Markdown file for that one big table and be fine.
The failed search for an easy migration process
I looked for a while for automated ways to export the content. My goals were:
- Retain existing permalinks so I don’t break incoming links
- Convert post content from HTML to Markdown
- Yes, technically Jekyll can serve HTML, but
- HTML posts are difficult to edit/maintain
- This can lead to unintentional styling quirks
- The interactive “contents” list in Jekyll has trouble finding the scroll location
- Convert media references to the proper relative URI
- Yes, technically Jekyll can serve HTML, but
- Export media files
- Retain metadata
- Title
- Date/time published
- Categories
- Tags
- Description
- Featured image
The Jekyll Exporter WordPress plugin
The Jekyll Exporter plugin for WordPress crashed when I tried to run it on on WordPress 6.6.1.
exitwp
The exitwp project has a great feature set that looked like exactly what I needed, mainly:
- Automatically converting posts from HTML to Markdown
- Automatically downloading post images and other content
However, exitwp isn’t a viable option anymore. It only supports Python 2, and all modern Linux distributions and macOS releases only support Python 3. The owner of the project also archived it on Jun 3, 2020.
With those two options gone, I turned to the official Jekyll importer. I tried the WordPress and WordPress.com importers, with mixed results.
The Jekyll Importer for WordPress
This importer is designed to be ran on self-hosted WordPress instances, where you have access to the backend database.
The good:
- Generated HTML with Front Data that includes (among other things)
- Date
- Title
- Categories
- Topics
- Tags
- Original URL
The bad:
- No SEO metadata (i.e. description featured image) included
- Does not copy any media files
- Media references in HTML maintain the original full URL
The ugly:
- Email addresses are listed in the Front Data for page authors and commenters
The Jekyll Importer for WordPress.com
This importer is designed for blogs hosted on WordPress and other cloud services where the blog owner does not have access to the server itself, but it can also be used for self-hosted WordPress installs.
The good:
- Downloads a copy of media referenced in posts
- Generated HTML with Front Data that includes (among other things)
- Date
- Title
- Categories
The bad:
- HTML posts, not Markdown
- Does not update referenced media URLs
The ugly:
- Includes a ton of useless internal metadata form various WordPress plugins in the Front Data
- But does not include any useful metadata, like description or featured image
My migration process
I ended up using the Jekyll importer for WordPress to export the HTML pages, then doing a munch of other things to turn those files into usable Markdown.
Start by copying the exported _posts directory to an instance of your Jekyll theme of choice.
Download all media content used in the posts
This is easy to do from the Media section of the WordPress admin section.
Then, rather than trying to recreate the YYYY/MM directory structure inside of assets, I created folders named images, docs, and data to keep things simple.
Remove the Personally Identifiable Information (PII)
I looked at the exported files and noticed that the Front Data included my email address and the email addresses of anyone who posted a comment!. This is not good, especially when this is going to be stored in a public GitHub project! So, I used the Find and Replace in Files feature of Visual Studio Code to remove the author details from all posts.
Then, I did the same thing regex mode to remove all lines matching email:.+$ to remove commenter email addresses.
Update the media reference URLs
Again, using the Find in Files feature of Visual Studio Code, I replaced anything matching the regex pattern /wp-content/uploads/.{4}/.{2}/ with /assets/images/
Convert HTML files to markdown using html2text
html2text is a Python package and CLI tool that can be used to convert HTML files to Markdown.
Check the content of the generated Markdown file before you delete the source! html2text is known to mangle the Front Data and remove
iframetags (e.g., embedded videos).
Run markdownlint on the converted files
markdownlint can be used as a CLI tool or Visual Studio Code extension. Use it to check for problems. Fix all of them (hopefully there are not many).
The
markdownlintVisual Studio Code extension can attempt to fix all problems in a file if you right-click on a problem in the problems list and select that option.
Look for attempts to embed media via oEmbed
WordPress supports oEmbed, which allows a post author to embed social media content just by placing the URL in the post body. oEmbed takes care of generating the HTML to actually embed that content. Unfortunately, Jekyll does not support oEmbed, and plugins that add oEmbed support are not maintained to be compatible with modern Jekyll.
So, look for social media URLs that are on their own, and replace them with the proper HTML. The social media networks will provide the embed HTML as a sharing option.
Add a permalink to the Front Data
To ensure that your URL matches the URL of your old blog, set the permalink value in the Front Data to the same URI as that post on your current blog. That way no incoming links are broken.
Even if you set a similar global permalink setting to your old blog, it might not tokenize the title in the exact same way. So it is safer to use a per-post permalink when migrating.
Add SEO metadata to the Front Data of the Markdown files
Add a description and a featured image
The Chirpy template supports both without any template modification. Just add the following to the Front Data of your post, replacing the URL and description, of course.
1
2
3
4
description: This in an example description
image:
  path: https://example.com/asets/featured.webp
  alt: An optional description/caption
If it has one, copy the description form the source HTML
Delete the source HTML file
Once you have completed the above steps, delete the HTML version of the file to avoid duplicate posts.
A note about comments
Because it is a static website, if you want comments on your blog a third-party service must be used for hosting comments, which are then rendered on blog pages at load time using JavaScript. Here is my assessment of the options.
No comments
Many times comments just end up being spam or trolls, so it might be useful not to have any comment system at all.
Disqus
I could imported the comments from my WordPress blog into Disqus, and then configured the Disqus integration built into the Chirpy them for Jekyll. Disqus would have matched the existing comment threads based on the page URL.
The good:
- Retain old comments
- Social media logins for commenters make commenting easy
The bad:
- Supported by content ads or the website owner paying a monthly fee
utterances
utterances uses the GitHub issues system to store comments.
The good:
- No tracking
- Open source
- No cost
The good/bad:
- A GitHub account is needed to comment, which might discourage a casual, non-technical person from commenting
- If the blog is a technical blog like mine, the comments are likely to be high quality
The bad:
- No way to import existing WordPress comments
giscus
giscus is heavily inspired by utterances and shares all of the same pros and cons. However, it uses the GitHub discussions feature to store the comments instead of the issue feature. It is also more customizable, so I chose it over utterances.
The old WordPress comments can still be found in the Front Data in the Markdown files, they are just not visible in the HTML pages.
Caching settings
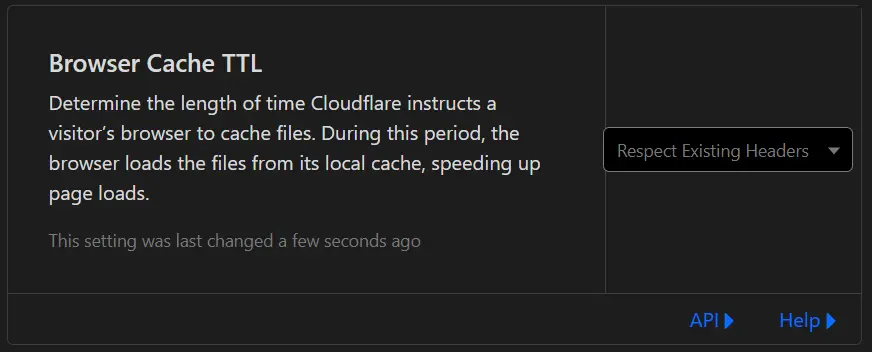
After I deployed Jekyll to GetHub pages, I noticed that changes that I made to to the pages were being cached in my browser for a long time. My blog is proxied through CloudFlare. In turns out my CloudFlare instance was configured to set the browser cache TTL to 4 hours. When I was using WordPress, that would help manage caching.
Because my new Jekyll site is completely static, the site was being cached for 4 hours. To fix this in Cloudflare, I Navigated to Caching> Configuration, and set the Browser Cache TTL setting to Respect Existing Headers.
Once that was fixed, I noticed a nice modern feature of the Chirpy theme that notifies the user when content changes while they have the site open.

I still use CloudFlare so I can get basic analytics without adding additional JavaScript or invasive trackers.